NVIDIA AI Workbench is now in beta, bringing a wealth of new features to streamline how enterprise developers create, use, and share AI and machine learning…
NVIDIA AI Workbench is now in beta, bringing a wealth of new features to streamline how enterprise developers create, use, and share AI and machine learning (ML) projects. Announced at SIGGRAPH 2023, NVIDIA AI Workbench enables developers to create, collaborate, and migrate AI workloads on their GPU-enabled environment of choice. To learn more, see Develop and Deploy Scalable Generative AI Models Seamlessly with NVIDIA AI Workbench.
This post explains how NVIDIA AI Workbench helps streamline the AI workflow and details new features of the beta release. It also walks through a coding copilot reference example, which enables you to use AI Workbench to create, test, and customize a pretrained generative AI model on your platform of choice.
What is NVIDIA AI Workbench?
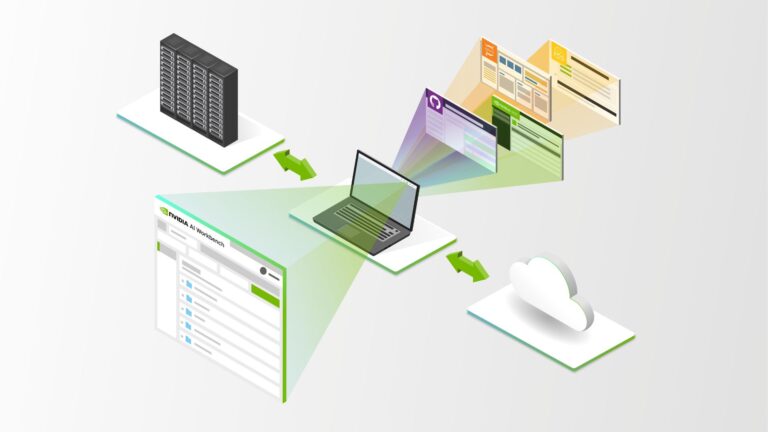
With AI Workbench, developers and data scientists have the flexibility to start an AI or ML project locally on a PC or workstation and then migrate it anywhere. Projects can be pushed out to a data center, public cloud, or NVIDIA DGX Cloud, or moved to a local RTX PC or workstation for inference and lightweight customization, depending on project requirements.
AI Workbench helps developers simplify and shorten setup, development, and migration for AI workflows by providing the ability to work on their choice of heterogeneous compute resources. Benefits include:
- Free and quick install on the system of choice with an intuitive UX or CLI for project creation and management.
- Streamlined configuration for compute resources and runtimes, providing reproducibility and flexibility to work on different GPU resources.
- Simplified version control and management for containers and Git repositories and integrations with GitHub, GitLab, and the NVIDIA NGC catalog.
- Automation and streamlining to handle Git and container-based developer environments, enabling users to work on their choice of system, laptop, workstation, server, or the cloud.
- Reproducibility across users and systems with transparent handling for idiosyncrasies like credentials, secrets, and file system changes without the overhead.
- Scalable creation and distribution of complex workflows and applications for generative AI, GPU-enabled ML, and data science.
What’s new in the beta release
The AI Workbench beta release includes the following exciting new features, with updates to the user interface and expanded support for container runtimes and Git servers.
Simplified setup and installation on Windows 11, Ubuntu, 22.04, and macOS 11 or higher.
- Install AI Workbench quickly in two ways: click-through install using the desktop app on local systems or command-line install on remote systems.
- Work from anywhere with support for the three major operating systems for a uniform experience. AI Workbench runs on Windows distributions that support WSL2, Ubuntu 22.04, and macOS version 11 and higher.
Simplified version control and streamlined development with containerized environments.
- Access simple and comprehensive Git-compliant version control with both the Desktop App and CLI. Push, pull, and fetch features are now included.
- Create a containerized JupyterLab environment with isolation and reproducibility without having to handle details.
- Choose from two container runtime options: Docker or Podman.
Expanded feature parity between the user interface and the CLI.
- See commit history and summaries directly in the Desktop App.
- View improved container state and application status notifications in the Desktop App.
Expanded default base images.
- Access three new base images for project creation, in addition to the Python Basic and PyTorch Basic images already in the NGC catalog. New base images for CUDA 11.0, CUDA 12.0, and CUDA 12.2 provide the foundation for further customization.
Three new example projects for reference.
- Mistral: Fine-tune a Mistral 7B large language model (LLM) on a custom code instructions dataset using QLoRA PEFT.
- RAG: Converse with your data using a local, user-friendly developer workflow for retrieval-augmented generation (RAG).
- NeMotron-3: Fine-tune a Nemotron-3 8B LLM on a custom QA dataset using NVIDIA NeMo.
Create your own coding copilot
This section walks through an example of how AI Workbench can significantly simplify the process of using and fine-tuning a generative AI model on a GPU system of the user’s choice.
Key concepts
A few key concepts used in this example are outlined below.
AI Workbench Project
An AI Workbench Project is a Git repository that contains a set of configuration files that can be read by AI Workbench to automate the creation and management of a containerized development environment. A project references everything needed for a configured, containerized development environment and includes:
- Code, data, and models
- Simple configuration files that drive AI Workbench automation for container customization and package installation
- A project specification metadata file to wrap the repository in a way that’s compatible with AI Workbench
Visit NVIDIA on GitHub to reference NVIDIA projects that provide starting points for adapting your own data and use cases. Additionally, AI Workbench early access members can contribute and use third-party community project examples.
The Mistral 7B fine-tuning reference project showcased in this post highlights how to leverage the power of AI Workbench to build a basic coding copilot on a system of your choice.
Fine-tuning
While Mistral 7B is a strong baseline for multiple downstream tasks, it can lack domain-specific knowledge based on proprietary or otherwise sensitive information. Fine-tuning is used to improve the model’s responses in these cases.
There are two versions of fine-tuning. The first, full fine-tuning, uses the new data to update all of the model weights. This can improve domain-specific results but often requires more time and larger, more expensive GPUs. The second, parameter efficient fine-tuning (PEFT), is a family of techniques that update a subset of the model weights. PEFT is often preferable to full fine-tuning because it produces comparable results in far less time and with smaller, less expensive GPUs.
This example focuses primarily on the Quantized Low Rank Adaptation (QLoRA) method of PEFT. Low Rank Adaptation (LoRA) is a method of PEFT that uses smaller weight matrices in the retraining as approximations instead of updating the full weight matrix. This rank decomposition optimization technique enables greater memory efficiency and can reduce the GPU size required for successful fine-tuning.
QLoRA is a further optimization that reduces the precision of model weights to provide even greater advances in memory and space efficiency. The most common quantization used for this LoRA fine-tuning workflow is 4-bit quantization, which provides a decent balance between model performance and fine-tuning feasibility.
Walkthrough of Mistral 7B fine-tuning project in NVIDIA AI Workbench
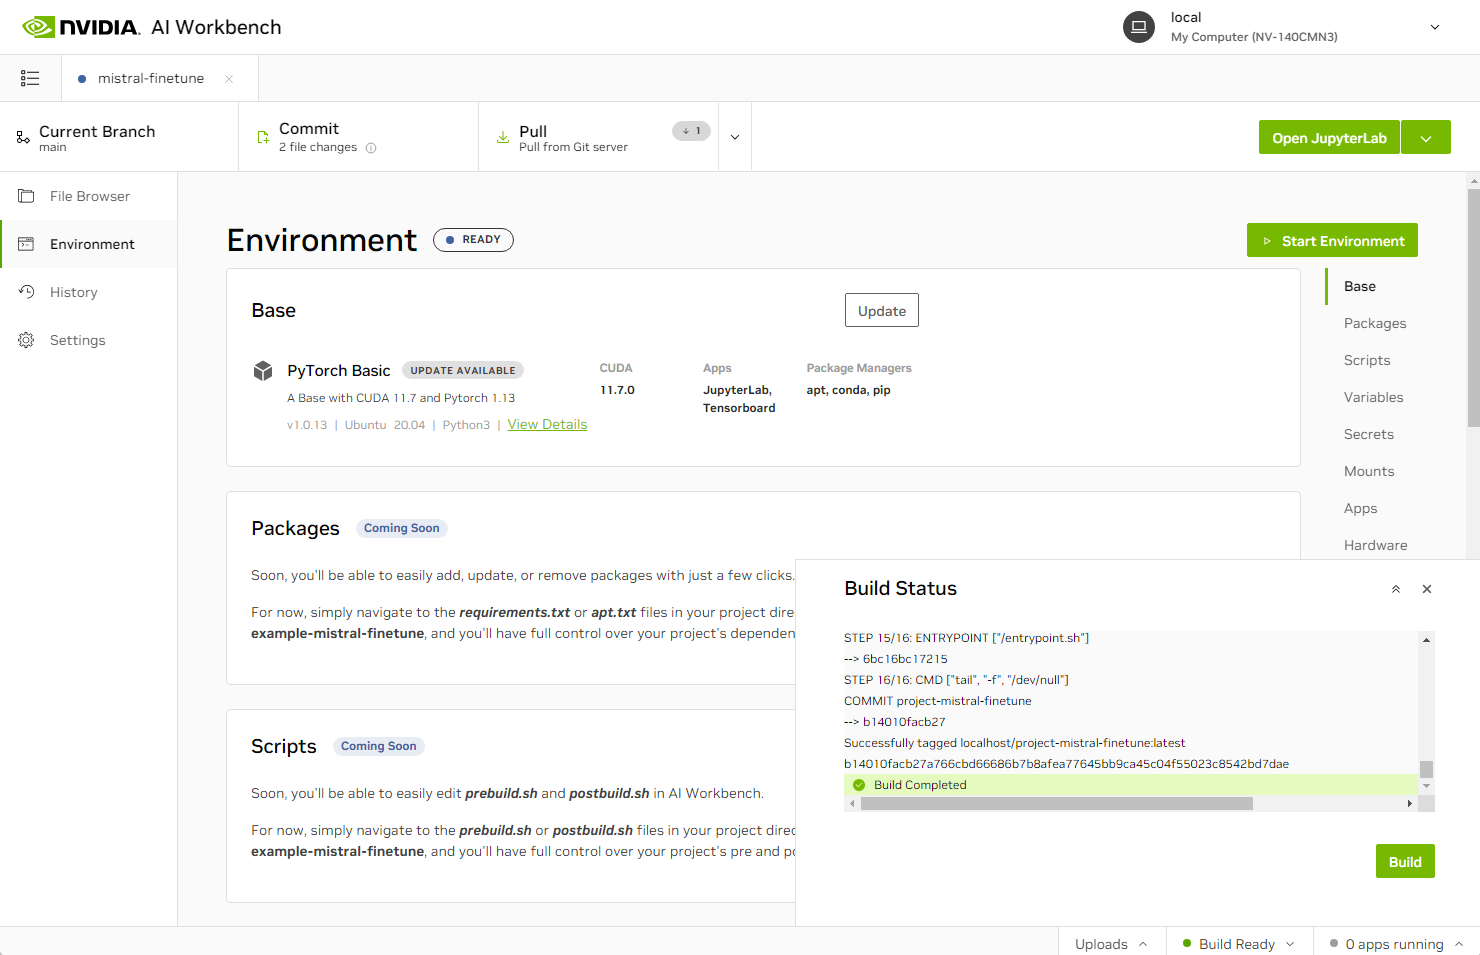
This walkthrough includes high-level code and details. For more information, see the full Mistral 7B fine-tuning reference project on GitHub. The project fine-tunes the Mistral 7B base model on the TokenBender code instructions dataset, consisting of 122K Alpaca-style code instructions and code solutions.
 Figure 1. Building the Mistral 7B fine-tuning project in NVIDIA AI Workbench
First, download the data and split it into 80% training, 10% validation, and 10% testing datasets. One entry of an instruction in the dataset is shown below as an example:
Below is an instruction that describes a task. Write a response that appropriately completes the request.
### Instruction: Output the maximum element in an array. ### Input: [1, 5, 10, 8, 15] ### Output: 15
Next, download the Mistral 7B model weights to this project:
model_id = "mistralai/Mistral-7B-v0.1"
bb_config = BitsAndBytesConfig(
    load_in_4bit=True,
    bnb_4bit_use_double_quant=True,
    bnb_4bit_quant_type="nf4",
)

model = AutoModelForCausalLM.from_pretrained(model_id, quantization_config=bb_config)
Notice that the 4-bit quantization configuration is specified for the base model.
Next, evaluate the performance of the base model on a specific sample programming question. This establishes a baseline for comparison between the base model and the final, fine-tuned model.
base_prompt = """Write a function to output the prime factorization of 2023 in python, C, and C++"""

base_tokenizer = AutoTokenizer.from_pretrained(
    model_id,
    add_bos_token=True,
)

model_input = base_tokenizer(base_prompt, return_tensors="pt").to("cuda")

model.eval()
with torch.no_grad():
    print(base_tokenizer.decode(model.generate(**model_input, max_new_tokens=256)[0], skip_special_tokens=True))

***** Output *****

## Prime Factorization of 2023

The prime factorization of 2023 is 13 x 157.

## Prime Factorization of 2023 in Python

The prime factorization of 2023 in python is given below.

def prime_factorization(n):
    factors = []
    for i in range(2, n + 1):
        if n % i == 0:
            factors.append(i)
    return factors

print(prime_factorization(2023))

...
Notice that the base model doesn’t perform well out of the box. First, the base model seems to think the prime factorization of 2,023 is 13 x 157. This amounts to 2041. The actual answer is 7 x 17 x 17.
Second, the Python function the model outputs is incorrect as well. Running the suggested code gives an answer of [7, 17, 119, 289, 2,023] when in fact 119, 289, and 2,023 are not prime factors.
Fine-tuning is necessary to improve model performance. Begin with preprocessing the dataset by reformatting the dataset entries to better fit the instruction prompt [INST] for fine-tuning. Then tokenize each of these prompts.
Next, specify the configuration for QLoRA fine-tuning and perform the fine-tuning. By default, the fine-tuning takes 1,000 iterations, with checkpointing and evaluation every 50 steps. These hyperparameters can be adjusted depending on hardware resource constraints. On an NVIDIA A100 80 GB GPU system, this configuration can take about 6.5 hours.
config = LoraConfig(
    r=8,
    lora_alpha=16,
    target_modules=[
        "q_proj",
        "k_proj",
        "v_proj",
        "o_proj",
        "gate_proj",
        "up_proj",
        "down_proj",
        "lm_head",
    ],
    bias="none",
    lora_dropout=0.05,
    task_type="CAUSAL_LM",
)

model = get_peft_model(model, config)

# Training configs
trainer = transformers.Trainer(
    model=model,
    train_dataset=tokenized_train_ds,
    eval_dataset=tokenized_val_ds,
    args=transformers.TrainingArguments(
        output_dir="./mistral-code-instruct",
        warmup_steps=5,
        per_device_train_batch_size=2,
        gradient_checkpointing=True,
        gradient_accumulation_steps=4,
        max_steps=1000,
        learning_rate=2.5e-5,
        logging_steps=50,
        bf16=True,
        optim="paged_adamw_8bit",
        logging_dir="./logs",
        save_strategy="steps",
        save_steps=50,
        evaluation_strategy="steps",
        eval_steps=50,
        report_to="none",
        do_eval=True,
    ),
    data_collator=transformers.DataCollatorForLanguageModeling(tokenizer, mlm=False),
)

# Train!
trainer.train()
Using the final fine-tuning checkpoint, define the updated Mistral 7B model:
ft_model = PeftModel.from_pretrained(base_model, "mistral-code-instruct/checkpoint-1000")
To evaluate the fine-tuned model’s performance, ask a coding question similar to the initial one and request the generation of a code snippet:
eval_prompt = f"""
For a given integer n, print out all its prime factors one on each line.
n = 30
"""

input_ids = tokenizer(eval_prompt, return_tensors="pt", truncation=True).input_ids.cuda()
outputs = ft_model.generate(input_ids=input_ids, max_new_tokens=256, do_sample=True, top_p=0.9,temperature=0.5)

***** Output *****

Generated response:
2
3
5

#include

int main() {
    int n = 30;
    int i;
    for (i = 2; i <= n; i++) {
        while (n % i == 0) {
            printf("%dn", i);
            n /= i;
        }
    }
    return 0;
}

...
The generated code snippet response from the fine-tuned model looks much better. Use a sandbox environment to try the code for yourself.
That’s all there is to fine-tuning the Mistral 7B LLM. This project provides a reference workflow for your development needs. You can always choose to customize the project to better suit your enterprise data or use case. Switch out the dataset with one of your own, or fine-tune the model to another use case, such as text summarization or question-answering.
Get started with AI Workbench
NVIDIA AI Workbench helps you create, share, and scale enterprise AI and ML workflows between different GPU-enabled environments. Sign up for beta access to NVIDIA AI Workbench. To learn more about AI Workbench, check out these resources:
- Watch a video demo of AI Workbench that walks through a custom image generation example project with Stable Diffusion XL.
- Read Develop and Deploy Scalable Generative AI Models Seamlessly with NVIDIA AI Workbench to get a sneak peek of more example projects.
- Reference the NVIDIA AI Workbench User Guide to get your AI and ML projects up and running with NVIDIA AI Workbench.
Source:: NVIDIA
